Welcome to my World

Welcome to my World
Showing posts with label TUTORIALS. Show all posts

Make a Photo Book When Memories start to fade

Recently my Mother-In-Law went to the nursing home. At 87 her 
memory is fading and remembering is becoming difficult. I wanted to
help her remember her family, so I decided if I made her a 
photo book it might help remember those she loves.

At Hobby Lobby I purchased this really pretty simple  paper-back photo book.
Pages are plain paper and measures 8" by 8" with 24 pages ( front & back)
I chose this one, I love mint.....I hope Mom does.


I used old photos of her parents as the first page.


After devoting the first few pages to old photos of her and the children when they
were young I gave each child a page.


Using cute tabs, I made, I divided the book into pages of, 
Children, Grandchildren, Great-Grandchildren and Great-Great-Grandchildren.

I've gone through all the old family photos and borrowed from Facebook pages
to find photos of her with family members. I chose to change all the photos to sepia tone as I wanted consistency.

I'm giving you all the elements I made for this photo book.
I hope you create your own and if you have any question, contact me.


Decoupage Eggs

I apologize for the poor quality of the first few photos, but it was a dark rainy day....
Here we go...you'll need a piece of card stock, white,tissue paper, a razor knife  and scotch tape.
Lay the card stock on the tissue paper.
Cut around the card stock leaving about 1/2" to an inch bigger than the card stock.


Fold the tissue over the card stock, keeping it tight, tape it down to the card stock.
Be sure all edges are tape, place the covered card stock in the,printer, print side down.
If you aren't sure which side of the paper your printer prints on, run a test print.


Here, I've printed my flowers.
With my  finger tightly on the image I want to cut out, slowly, I cut out the image with the razor knife .
Before applying the image to my eggs, I trim it closer with small craft scissors.


Here's the sheet of lavender flowers for you.....
(Click the image to print / download )

 Lavender Flowers


To decoupage the images onto the eggs you'll need,
Wax paper, decoupage medium, a small paint brush, and if you are going to cover your egg with tissue paper or craft paint first, the craft paint. Eggs, I purchased these neat craft eggs at Walmart. I noticed yesterday at my Neighborhood Market they had a big bin left over and marked down. I stocked up for next year.
I choose a pink napkin, but don't recommend napkins. They are too hard to work with.
Since you printed on white tissues paper, the edges will not show on the white eggs.


Coat the egg with decoupage medium, let dry.


Since I covered this egg with pink napkin first, I tore the napkin in small pieces .
On the wax paper, coat the tissue paper ( remember I used napkin) one piece at a time and apply it to the egg. I used tweezers to pick up my decoupaged pieces and place on the egg.
With your fingers, gently press down the image. Make sure the,piece is completely covered and stuck to the egg.
Go on to the next piece, until the egg is completely covered.


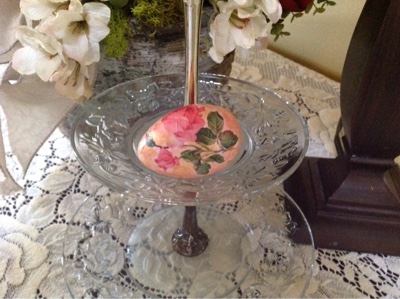
After my egg was completely covered with the napkin, I place my first flower image on the wax paper and liberally coated it with the decoupage medium, then placed it on the egg, pressing it flat and smooth with my fingers.


Isn't that pretty?
I only used two of the larger rose images on this egg.
When you have all the images you want on your egg, paint a coat of decoupage medium over the complete egg.
With this egg I dabbed gold craft paint around my roses.


This egg, I left white, then added the gold craft paint.


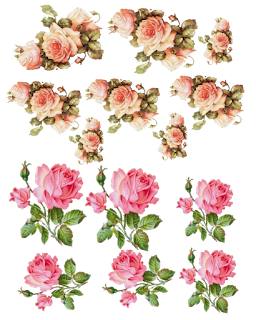
Here's the sheet of pink roses
( Click the image to print / download )

 Pink Roses

Here is a sheet of various flower images
(Click the image to print / download )


 Glenda's Tutorials


Pockets-N-Note Cards

This morning I designed a really cute pocket you can glue onto
a paper lunch bag, a present or onto a scrapbook page.
I've done some in color and for my adventurous ones I 
did a short tutorial for you how to make some any color you choose !!!
Enjoy


Now, open the free online software


Making Your Own Colored Damask Paper from Black and White


I'm going to give you a quick tutorial how to make your own colored damask paper using this black and white damask paper from ONE WILLIS FAMILY.
The frst step is to go their lovely site and downlod this paper. ( put it in a file easy for you to find. I suggest making a file just for it)

*** NOTE***
If you want to use the same roses I did, go to the bottom of
the post and get them too

One Willis Family: Free Damask Digital paper

The online editing program Picmonkey


Click to downlod the roses