

I apologize for the poor quality of the first few photos, but it was a dark rainy day....
Here we go...you'll need a piece of card stock, white,tissue paper, a razor knife and scotch tape.
Lay the card stock on the tissue paper.
Cut around the card stock leaving about 1/2" to an inch bigger than the card stock.

Fold the tissue over the card stock, keeping it tight, tape it down to the card stock.
Be sure all edges are tape, place the covered card stock in the,printer, print side down.
If you aren't sure which side of the paper your printer prints on, run a test print.

Here, I've printed my flowers.
With my finger tightly on the image I want to cut out, slowly, I cut out the image with the razor knife .
Before applying the image to my eggs, I trim it closer with small craft scissors.
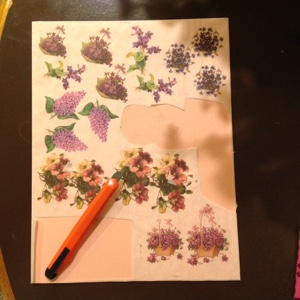

Here's the sheet of lavender flowers for you.....
(Click the image to print / download )

To decoupage the images onto the eggs you'll need,
Wax paper, decoupage medium, a small paint brush, and if you are going to cover your egg with tissue paper or craft paint first, the craft paint. Eggs, I purchased these neat craft eggs at Walmart. I noticed yesterday at my Neighborhood Market they had a big bin left over and marked down. I stocked up for next year.
I choose a pink napkin, but don't recommend napkins. They are too hard to work with.
Since you printed on white tissues paper, the edges will not show on the white eggs.

Coat the egg with decoupage medium, let dry.

Since I covered this egg with pink napkin first, I tore the napkin in small pieces .
On the wax paper, coat the tissue paper ( remember I used napkin) one piece at a time and apply it to the egg. I used tweezers to pick up my decoupaged pieces and place on the egg.
With your fingers, gently press down the image. Make sure the,piece is completely covered and stuck to the egg.
Go on to the next piece, until the egg is completely covered.

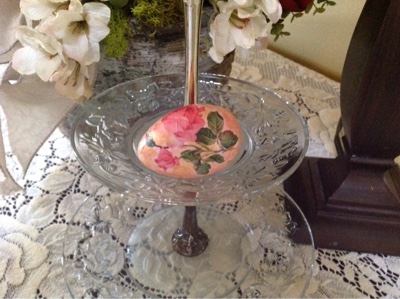
After my egg was completely covered with the napkin, I place my first flower image on the wax paper and liberally coated it with the decoupage medium, then placed it on the egg, pressing it flat and smooth with my fingers.


Isn't that pretty?
I only used two of the larger rose images on this egg.
When you have all the images you want on your egg, paint a coat of decoupage medium over the complete egg.
With this egg I dabbed gold craft paint around my roses.
This egg, I left white, then added the gold craft paint.

Here's the sheet of pink roses
( Click the image to print / download )

Here is a sheet of various flower images
(Click the image to print / download )


6 comments :
I love these beautiful eggs! Thank you so much for the tutorial. I'm heading to Walmart today to see if they still have any craft eggs. Thanks for the tip! Dawn
Just a note: The last sheet of various flower images is not in the same format to download as the other sheets. Also, it shows up on a black background. Not sure if you intended that. Dawn
You are very welcome!
Buy extra, we can display pretty eggs year round !
Any questions, let me know !
These are so pretty and thank you for sharing. I was just thinking how pretty they would look for Mother's Day or a Tea Party.
Thank you Sande.
You're the second to mention Mothers Day. I would love a bowl of pretty eggs. Keep an eye out, I'll do some Mother's Day designs.
Thanks for the idea
DH, thank you for lettling me know about my download problem.
I have fixed it !
thanks again !
Post a Comment